centos下docker +nginx完成负载均衡vue项目
本文共 1020 字,大约阅读时间需要 3 分钟。
vue与普通web项目
普通web项目是放在不同的tomcat下用nginx完成负载均衡
vue需要在nginx里配置负载均衡多个其他nginx完成负载均衡搭建
- 安装docker
- 在docker中拉取nginx
- 在宿主机中新建需要挂载nginx配置文件以及前端项目的文件夹,比如 mkdir -p /home/docker-nginx,
- 在docker-nginx下
mkdir -p {html,conf,conf.d,logs} 
html:挂载前端项目位置 /usr/share/nginx/html 这里可以不用挂载,在部署前端项目的被负载均衡的服务器介意挂载
conf:需要在conf里建立nginx.conf文件,可以网上从容器直接复制过来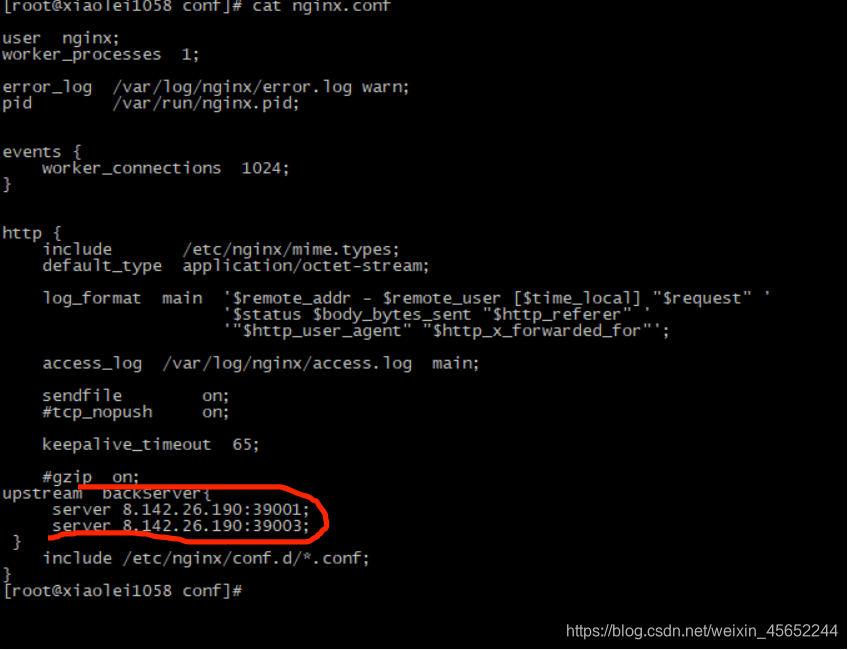 红线标的是负载均衡的两个服务,也可以配置在conf.d文件夹下的default.conf文件中(docker中nginx的nginx.conf的子文件),注意这里在挂载时是文件挂载 conf.d:用来挂载docker中nginx的/etc/nginx/conf.d文件夹 挂载时属于目录挂载,目录下的default.conf如下配置
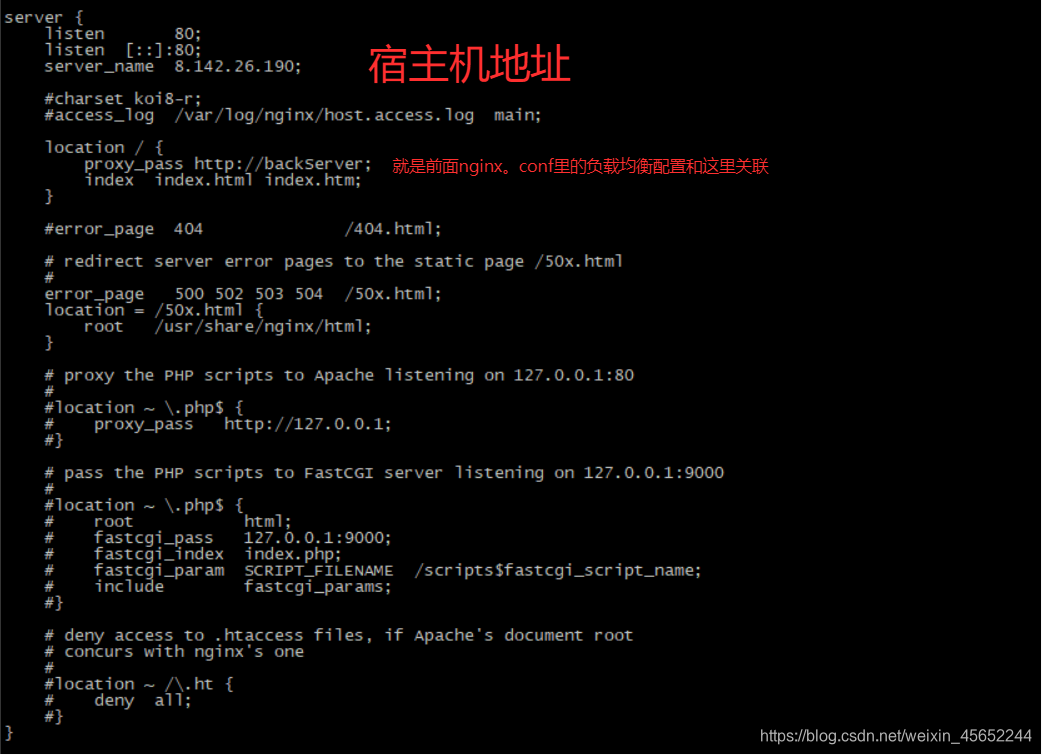
logs:用来挂载 /var/log/nginx
开始启动并且挂载挂载
docker run --name mynginx -d -p 39002:80 -v /home/docker-nginx3/html:/usr/share/nginx/html -v /home/docker-nginx3/conf/nginx.conf:/etc/nginx/nginx.conf -v /home/docker-nginx3/conf.d/default.conf:/etc/nginx/conf.d/default.conf -v /home/docker-nginx3/logs:/var/log/nginx nginx
之后只需要在其他服务器上的nginx下或者同服务器docker中不同端口的nginx容器中部署前端项目就可以
操作同上,只不过不一样配置 因为我的是同一宿主机docker中不同nginx容器举其中端口号为39001的为例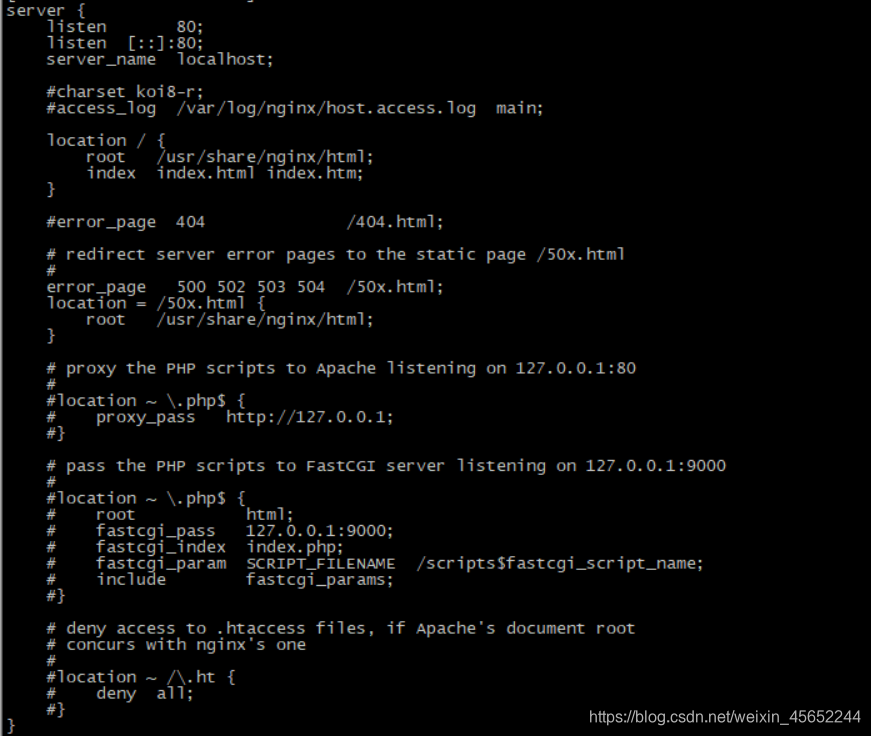
只需要将目录挂载出来。
将前端vue项目打包的dist下的所有的文件上传至挂载目录下即可 测试39002主nginx 端口为39001为1111 端口为39003为22222 现在访问39003,负载均衡成功
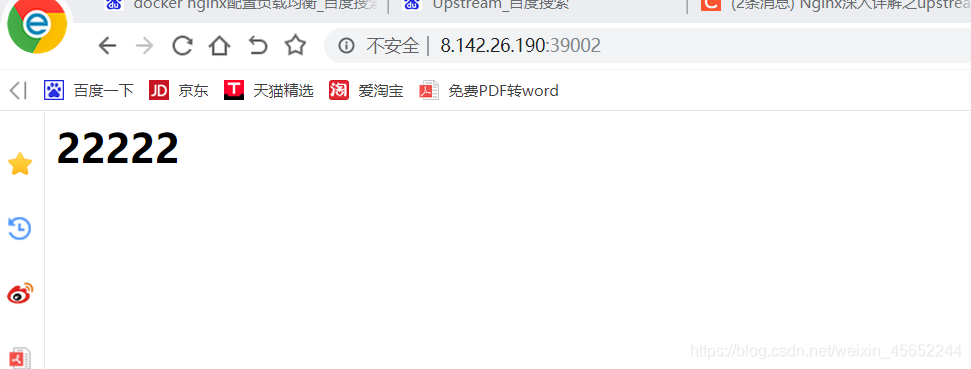
转载地址:http://oxfk.baihongyu.com/
你可能感兴趣的文章
mysql与mem_细说 MySQL 之 MEM_ROOT
查看>>
MySQL与Oracle的数据迁移注意事项,另附转换工具链接
查看>>
mysql丢失更新问题
查看>>
MySQL两千万数据优化&迁移
查看>>
MySql中 delimiter 详解
查看>>
MYSQL中 find_in_set() 函数用法详解
查看>>
MySQL中auto_increment有什么作用?(IT枫斗者)
查看>>
MySQL中B+Tree索引原理
查看>>
mysql中cast() 和convert()的用法讲解
查看>>
mysql中datetime与timestamp类型有什么区别
查看>>
MySQL中DQL语言的执行顺序
查看>>
mysql中floor函数的作用是什么?
查看>>
MySQL中group by 与 order by 一起使用排序问题
查看>>
mysql中having的用法
查看>>
MySQL中interactive_timeout和wait_timeout的区别
查看>>
mysql中int、bigint、smallint 和 tinyint的区别、char和varchar的区别详细介绍
查看>>
mysql中json_extract的使用方法
查看>>
mysql中json_extract的使用方法
查看>>
mysql中kill掉所有锁表的进程
查看>>
mysql中like % %模糊查询
查看>>